This document
from Microsoft Technet describes how you can share a wired Internet
Connection with your other computers by setting up an ad-hoc wireless
network.
1.From the Windows XP desktop, click Start, click Control Panel, click Network and Internet Connections, and then click Network Connections.
2.Right-click the Ethernet network connection that is used to access the Internet, and then click Properties.
3.On the Advanced tab, select the Allow other network users to connect through this computer’s Internet connection check box and clear the Allow other network users to control or disable this shared Internet connection check box.
4.Click OK to save changes to your connection.
5.You might be prompted with a Local Network message box that explains how your computer’s configuration is being changed. Click Yes to enable Internet sharing.
1. From the Windows XP desktop, click Start, click Control Panel, click Network and Internet Connections, and then click Network Connections.
2. Right-click the wireless network connection, and then click Properties.
3. Click the Wireless Networks tab.
4. In the wireless network adapter properties dialog box, click Add under Preferred networks.
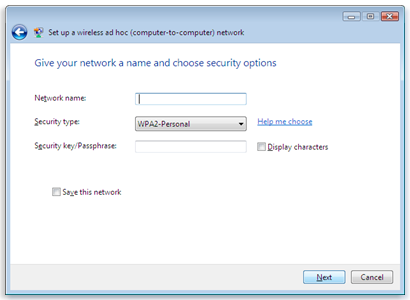
5. On the Association tab, type the name of your ad hoc wireless network in Network name (SSID). For example, you could name your wireless network AdHocInternet.
6. Select the This is a computer-to-computer (ad hoc) network check box and clear the The key is provided for me automatically check box.
7. In Network Authentication, select Open.
8. In Data encryption, select WEP.
9. In Network key, type the WEP key. The WEP key should be a random sequence of hexadecimal digits or numbers, letters, and punctuation.
10.In Confirm network key, retype the WEP key.
11.Click OK to save changes to the wireless network.
12.Click OK to save changes to the wireless network adapter.
These instructions configure an encryption key for wireless communications on the ad hoc wireless network. You must tell the other users who want to access the Internet the WEP key. You can create an ad hoc wireless network without requiring encryption and an encryption key, but it is not recommended.
1. Once the new ad hoc wireless network is created, Windows XP on other laptop computers should detect it and prompt you with a One or more wireless networks are available or Wireless networks detected message in the notification area of your taskbar.
2. Click the notification message.
If you are not notified, right-click the wireless network adapter in Network Connections and click View Available Wireless Networks.
You should see the Wireless Network Connection dialog box (for Windows XP with SP2), a dialog box with the name of the wireless connection (for Windows XP with SP1), or the Connect to Wireless Network dialog box (for Windows XP with no service packs installed). An example of the Wireless Network Connection dialog box for Windows XP with SP2 is shown in the following figure.
3. For Windows XP with SP2, click the name of the new ad hoc wireless network in the list, and then click Connect. When prompted by the Wireless Network Connection dialog box, the WEP key in Network key and Confirm network key, and then click Connect.
For Windows XP with SP1, click the name of the new ad hoc wireless network in Available networks, type the WEP key in Network key and Confirm network key, and then click Connect.
For Windows XP with no service packs installed, click the name of the new ad hoc wireless network in Available networks, type the WEP key in Network key, and then click Connect.
Now that the laptop computer is connected to the ad hoc wireless network, you must configure it for either Windows Firewall or ICF and automatic addressing by doing the following:
1. From the Windows XP desktop, click Start, click Control Panel, click Network and Internet Connections, and then click Network Connections.
2. Right-click the network connection that corresponds to the wireless network adapter, and then click Properties.
3. For computers running Windows XP with SP2, click the Advanced tab, and then click Settings. From the Windows Firewall dialog box, click On, and then click OK.
For computers running Windows XP with SP1 or Windows XP with no service packs installed, click the Advanced tab, and then select the Protect my computer and network by limiting or preventing access to this computer from the Internet check box.
4. Click the General tab, double-click Internet Protocol (TCP/IP) in the This connection uses the following items list.
5. On the General tab, click Obtain an IP address automatically and Obtain DNS server address automatically.
6. Click OK to save the changes to the configuration of Internet Protocol (TCP/IP).
7. Click OK to save the changes to your connection’s configuration.
The laptop computer should receive an IP address configuration from the ICS host computer and have Internet connectivity. Test Internet connectivity by using a Web browser to view Web pages.
Step 1: Enabling Internet Sharing on the Host Computer
To enable Internet sharing on the host computer, do the following:1.From the Windows XP desktop, click Start, click Control Panel, click Network and Internet Connections, and then click Network Connections.
2.Right-click the Ethernet network connection that is used to access the Internet, and then click Properties.
3.On the Advanced tab, select the Allow other network users to connect through this computer’s Internet connection check box and clear the Allow other network users to control or disable this shared Internet connection check box.
4.Click OK to save changes to your connection.
5.You might be prompted with a Local Network message box that explains how your computer’s configuration is being changed. Click Yes to enable Internet sharing.
Step 2: Creating an Ad Hoc Wireless Network on the Host Computer
To create an ad hoc wireless network to share Internet access with the other WLAN computers on a computer running Windows XP, do the following:1. From the Windows XP desktop, click Start, click Control Panel, click Network and Internet Connections, and then click Network Connections.
2. Right-click the wireless network connection, and then click Properties.
3. Click the Wireless Networks tab.
4. In the wireless network adapter properties dialog box, click Add under Preferred networks.
5. On the Association tab, type the name of your ad hoc wireless network in Network name (SSID). For example, you could name your wireless network AdHocInternet.
6. Select the This is a computer-to-computer (ad hoc) network check box and clear the The key is provided for me automatically check box.
7. In Network Authentication, select Open.
8. In Data encryption, select WEP.
9. In Network key, type the WEP key. The WEP key should be a random sequence of hexadecimal digits or numbers, letters, and punctuation.
10.In Confirm network key, retype the WEP key.
11.Click OK to save changes to the wireless network.
12.Click OK to save changes to the wireless network adapter.
These instructions configure an encryption key for wireless communications on the ad hoc wireless network. You must tell the other users who want to access the Internet the WEP key. You can create an ad hoc wireless network without requiring encryption and an encryption key, but it is not recommended.
Step 3. Connect other Computers to your new Ad Hoc Wireless Network
To connect each other laptop computer to the newly created ad hoc mode wireless network, do the following:1. Once the new ad hoc wireless network is created, Windows XP on other laptop computers should detect it and prompt you with a One or more wireless networks are available or Wireless networks detected message in the notification area of your taskbar.
2. Click the notification message.
If you are not notified, right-click the wireless network adapter in Network Connections and click View Available Wireless Networks.
You should see the Wireless Network Connection dialog box (for Windows XP with SP2), a dialog box with the name of the wireless connection (for Windows XP with SP1), or the Connect to Wireless Network dialog box (for Windows XP with no service packs installed). An example of the Wireless Network Connection dialog box for Windows XP with SP2 is shown in the following figure.
3. For Windows XP with SP2, click the name of the new ad hoc wireless network in the list, and then click Connect. When prompted by the Wireless Network Connection dialog box, the WEP key in Network key and Confirm network key, and then click Connect.
For Windows XP with SP1, click the name of the new ad hoc wireless network in Available networks, type the WEP key in Network key and Confirm network key, and then click Connect.
For Windows XP with no service packs installed, click the name of the new ad hoc wireless network in Available networks, type the WEP key in Network key, and then click Connect.
Now that the laptop computer is connected to the ad hoc wireless network, you must configure it for either Windows Firewall or ICF and automatic addressing by doing the following:
1. From the Windows XP desktop, click Start, click Control Panel, click Network and Internet Connections, and then click Network Connections.
2. Right-click the network connection that corresponds to the wireless network adapter, and then click Properties.
3. For computers running Windows XP with SP2, click the Advanced tab, and then click Settings. From the Windows Firewall dialog box, click On, and then click OK.
For computers running Windows XP with SP1 or Windows XP with no service packs installed, click the Advanced tab, and then select the Protect my computer and network by limiting or preventing access to this computer from the Internet check box.
4. Click the General tab, double-click Internet Protocol (TCP/IP) in the This connection uses the following items list.
5. On the General tab, click Obtain an IP address automatically and Obtain DNS server address automatically.
6. Click OK to save the changes to the configuration of Internet Protocol (TCP/IP).
7. Click OK to save the changes to your connection’s configuration.
The laptop computer should receive an IP address configuration from the ICS host computer and have Internet connectivity. Test Internet connectivity by using a Web browser to view Web pages.


