Monday, August 9, 2021

How to Insert and Crop an Image to Fit a Shape in Microsoft PowerPoint


When you use images in your slideshows, you want them to be attractive. One way is to combine a shape with your image. You can easily insert and crop an image to fit or fill a shape in PowerPoint.

Insert an Image into a Shape in PowerPoint

After creating the shape that you want to insert an image into, you’ll actually fill the shape with the image.

Select the shape and go to the Shape Format tab that displays. Click “Shape Fill” in the Shape Styles section of the ribbon and choose “Picture.”


Pick From a File, Stock Images, Online Pictures, or From Icons, depending on the picture that you’d like to use. Select the image and click “Insert.”


The image that you picked will then fill the shape. Now, you can adjust how the image is formatted within the shape using two actions: Fill or Fit.

   Fill or Fit the Image in the Shape

When you “Fill” a shape with an image, this adjusts the picture size to match the shape’s height or width, whichever is greatest. When you “Fit” a shape with an image, this adjusts the picture size so that both the height and width match the shape.

Click the image within the shape and go to the Picture Format tab that appears. Then, click the arrow below “Crop” in the Size section of the ribbon and choose either “Fill” or “Fit.”


You’ll notice that Fill and Fit each provide quite a different appearance. Since this is an optional step after inserting the image into the shape, choose the best option for you.


Crop an Image as a Shape in PowerPoint

If you have an image that you want to crop into a shape in your slideshow, you can do this as well.

Select the image and go to the Picture Format tab. Click the arrow below “Crop” in the Size section of the ribbon and choose “Crop to Shape.” Choose the shape that you want to use in the pop-out menu.


The image will immediately update into that shape.


You can then select the image and use the tools on the Picture Format tab, or you can right-click to open the Format Picture sidebar to add some pizzazz.


Monday, July 12, 2021

How to fix the application was unable to load a required component msvcp140_codecvt_ids.dll or any other Microsoft Visual Studio Libraray missing files

 VCRUNTIME140_1.dll, VCRUNTIME140_1.dll, msvcp140_codecvt_ids.dll and MSVCP140_CODECVT_IDS.dll are common issues with new applications.

luckily there is a very easy fix! You simply install the latest Microsoft Visual C++ Redistributable (2015-2019) and it should fix your issues! This is 100% safe! vc_redist installers: https://support.microsoft.com/en-us/h... NEVER manually place .dll files in the System32 and SysWOW64 folders if you do not know what you are doing! This could make the issue worse.


Thursday, July 8, 2021

How to Use Google Fonts in Microsoft Word

 Google Fonts aren’t limited to the web. You can download and use them locally in apps like Microsoft Word. We’ll show you how to download and use these fonts on both Windows and Mac computers.

First, Download the Fonts

First, download the font or fonts that you want to use in your documents from the Google Fonts Library. You can download specific fonts or grab them all at once.

Let’s begin with downloading a specific font. Head to the Google Fonts site and select the font to download.

Select a font on the Google Fonts site.

On the font’s screen, click “Download family” in the top-right corner.

Click "Download family" on the Google Fonts site.

If you want to download all fonts from Google Fonts, open Google Fonts on GitHub in your web browser. From there, scroll down to the “Download All Google Fonts” section and click the download link.

Download all Google Fonts from GitHub.

Now, Install Your Downloaded Google Fonts

The next step is to install downloaded fonts on your Windows or Mac computer.

ADVERTISEMENT

To do this, first, double-click the downloaded ZIP archive to open it. Then, double-click the font file (It usually ends with .ttf extension.) to open the font.

Note: Note: If there are multiple fonts in an archive, repeat the process for each font.

Double-click the downloaded font file in "File Explorer" on Windows.

Your computer will open a preview of the selected font. If you’re on Windows, click “Install” at the top of this window.

Click "Install" on the font preview screen in Windows.

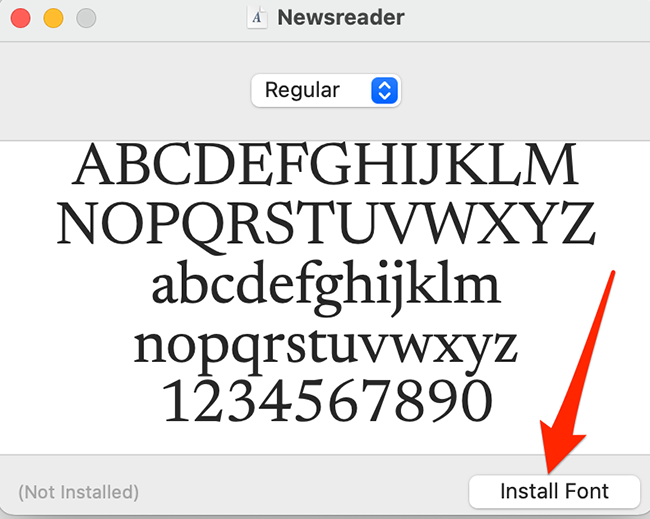
Mac users need to click “Install Font” at the bottom of the preview window.

Click "Install Font" on the font preview screen in Mac.

The selected font will now be installed on your computer.

Let’s Use Google Fonts in Microsoft Word

In Microsoft Word, you would use a Google Font the same way that you use any other font.

ADVERTISEMENT

To access the newly installed font in Word, open an existing document in Word or select “Blank document” on Word’s main screen to create a new one.

Select "Blank document" in Microsoft Word.

In Word’s editing window, on the Home tab of the Ribbon, look for the “Font” group and click the drop-down menu (which displays the current font name).

Click the font drop-down menu on the Word window.

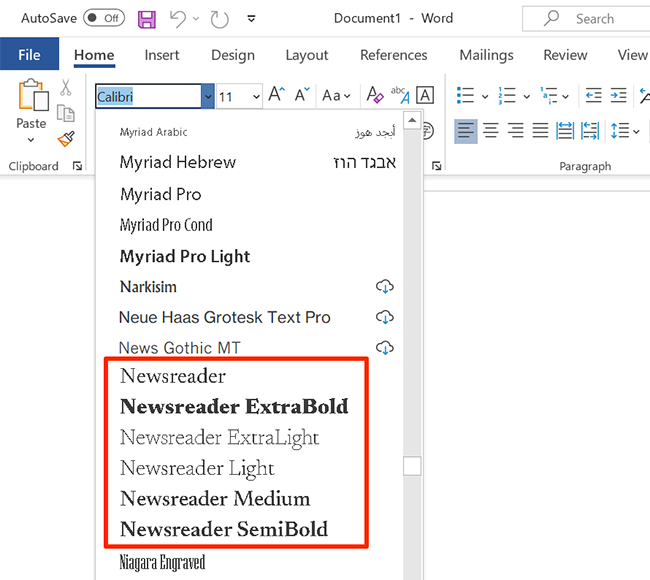
Scroll down the font drop-down menu, find your newly installed Google Font, and click it.

Select the Google Font from the fonts menu in Word.

Click anywhere in your document to start typing with your selected Google Font.

Type with a Google Font in Microsoft Word.

And that’s how you bring and use Google’s web fonts locally on your Windows or Mac computer!

How to pin file to start menu windows 10

 Ok, this is a workaround that worked for me.


Any shortcut to a file you put in here:

C:\Users\*YourUserName*\AppData\Roaming\Microsoft\Windows\Start Menu\Programs

will appear in the "All apps" list under the Windows "Start" button on the taskbar. (Note: "AppData" is a hidden folder, so from file explorer, you might want to go to "view" and put a checkbox beside "hidden items" first. Otherwise type the whole string into File Explorer to get to this folder.)

To pin a File, 
1. Right-click on the File you want to pin to the Start Screen.
2. Click "Copy"
3. Go to "C:\Users\*YourUserName*\AppData\Roaming\Microsoft\Windows\Start Menu\Programs"
4. Right-click again in the folder window, then click "Paste shortcut"
5. Go to your "All apps" list under the Start button, and scroll down to find the name of the File you just pasted.
6. Right click on this file from the "Apps list" and click "Pin to start".
7. Your done.

There is a registry hack to enable "Pin to start" from the Right Click menu. For those who don't mind editing the registry, 

Ok, as promised here is the Registry hack for Windows 10 that will save you about 4 steps in the previous method. This is a bit more elegant, but involves a registry edit.

First we want to create the Registry value to merge with the Registry. To do so, open up Notepad and copy and paste the below code just as it appears into a new text document.

Windows Registry Editor Version 5.00

[HKEY_CLASSES_ROOT\*\shellex\ContextMenuHandlers\PintoStartScreen]
@="{470C0EBD-5D73-4d58-9CED-E91E22E23282}"

Save the text file to your desktop with a name like, "PinToStartHack.txt"

Now, Right-click on this text file and rename the file extension from ".txt" to ".reg", so your text file will now be called "PinToStartHack.reg"

Double click this file to merge its contents with your Registry.

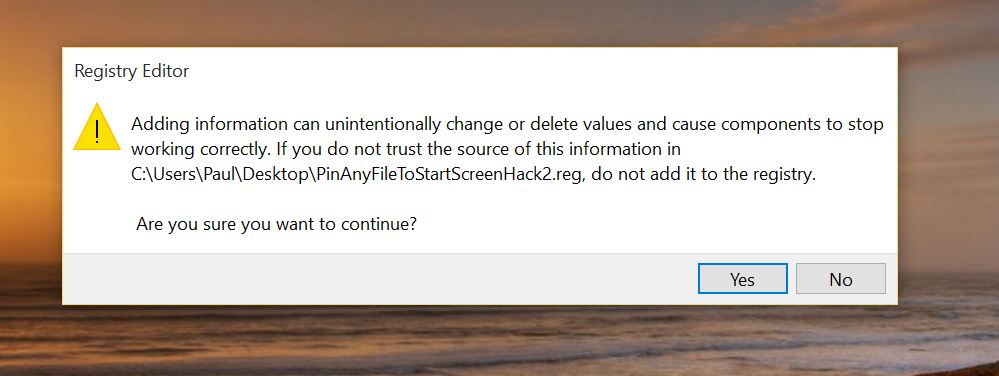
Image

Click Yes.


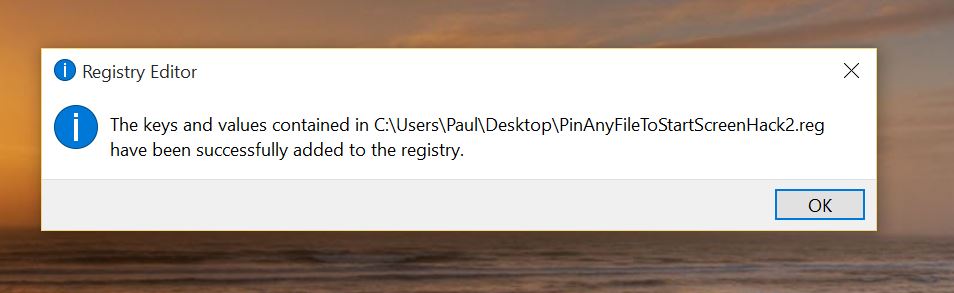
Image

Click OK.


IMPORTANT: You'll only be able to Pin a Shortcut to any file, not the actual file itself. So you'll need to create the shortcut first, right-click it and choose pin to start, then delete the shortcut. So let's do that.

Right-click on the File you want to pin (My Holiday Plans.docx in the example below), and click "Create shortcut".

Next, right click on the shortcut you just created, and choose, "Pin to Start"


Once you have pinned the File, you can then delete the shortcut. (Right-click on the shortcut you created and choose, "Delete shortcut".)

Now, go to the Start Screen, and you should see your File as the last tile on the Start Screen.


Enjoy :-)

To Remove the Registry Hack

If for some unknown reason, you wish to delete the registry entry, just type "regedit" in the search bar, and run "regedit.exe". Then drill down to

"HKEY_CLASSES_ROOT\*\shellex\ContextMenuHandlers\PintoStartScreen"

Delete the "PintoStartScreen" folder item.

Close the registry editor.

Monday, February 1, 2021

How to FIX VirtualBox VM Session was closed before any attempt to power it on ?

 This tutorial contains instructions to fix the following error in VirtualBox: "Failed to open a session for the virtual machine. The VM session session was closed before any attempt to power it on" with Result Code: E_FAIL (0x80004005).

FIX VirtualBox Error "VM Session was closed before any attempt to power it on"

The VirtualBox error "VM Session was closed before any attempt to power it on" usually occurs when the user shuts down the host machine without shutting down the VM guest machine first.

How to FIX VirtualBox Error: "The VM Session was closed before any attempt to power it on".

Method 1. Discard VM's Saved State.
Method 2. Uninstall and Re-Install VirtualBox.

Method 1. Discard VM's Saved State.

The usually method to fix the "VM session session was closed before any attempt to power it on", is to discard the saved state of the Virtual machine. To do that:

1. Right click on the Virtual Machine and select Discard Saved State.


Discard Saved State Virtual Machine

2. Then try to start the virtual machine. If the problem persists, continue to the next method below.


Method 2. Uninstall and Re-Install VirtualBox.

The next method to solve the "VM session session was closed before any attempt to power it on" problem in VirtualBox, is to uninstall and then to reinstall the VirtualBox application, especially if the problem appeared after a Windows Update.

1. Go to Control Panel & Uninstall VirtualBox. (Don't worry, the VMs will stay untouched).
2. Reboot your computer.
3. Download latest version of VirtualBox.
4. Right click on the downloaded file and click "Run As Administrator".
5. Follow the on screen prompts to install VirtualBox.

virtualbox vm fails to start

6. After installation, reboot your computer.
7. Open VirtualBox manager and start your Virtual Machine.
8. If the Virtual Machine opens fine, then proceed to install the Guest Additions and the Extension Pack (if needed).

fix Failed to open a session for the virtual machine - virtualbox