Thursday, December 23, 2021

How to Setup Auto Reply in Gmail?

 Enable & Create Templates for Auto-Reply in Gmail

Gmail has tons of built-in features that are mostly disabled for a basic user, If you want them you have to configure it from the settings. So, Auto Reply can not be done without creating a template first. So, click on the gear icon and choose All Settings.

Access Gmail All Settings

Go to the Advanced tab, and enable the Template which is turned off by default.

Enable Template in Gmail

After that save the changes and move to the next step.

Create a Template for Auto Reply in Gmail

After enabling the template inside Gmail, you have to create a template specifically for your need. Suppose I am creating an auto-reply for the guest post for my website, which you have to create based on your need. To create a new template, click on the compose, right the content of the email, and then click on the three dots. After that, click on the Templates> Save as Template> Save as a New Template.

Create A New Template

After creating the Template, Name your Template and save it.

Name the Template

Setup Auto Reply in Gmail

The template has been created, however, right now we need to create the conditions in which the template should be sent automatically. To do that click on the search options.

Search options

Mention the criteria for the Auto Reply, you can type the Name, subject, or any other fields. Once You are done, click create a filter.

Auto Reply in Gmail

Create a Filter

After you click the create a filter, on the next page, check the Send template box, then choose the template you just created.

Auto Reply in Gmail

Send template as an Auto Reply

Once you checked the Template click create the filter.

Auto Reply in Gmail

Create the Filter

One last step is Remaining, and that is about allowing the filter from the Gmail Settings. To do it, click on the Gmail Settings> Go to the Filters and blocked addresses> and check the box of matches.

Auto Reply in Gmail

Tuesday, November 23, 2021

How to allow Windows 10 ping through PowerShell netsh command

Those who don’t want to use the GUI method because of the multiple steps involved to allow Ping on Windows can go for command-line one. In which, we just need to run Powershell or Command prompt with Administrative right and after that copy-paste the command given here.

Open Powershell or Command prompt as an Administrator

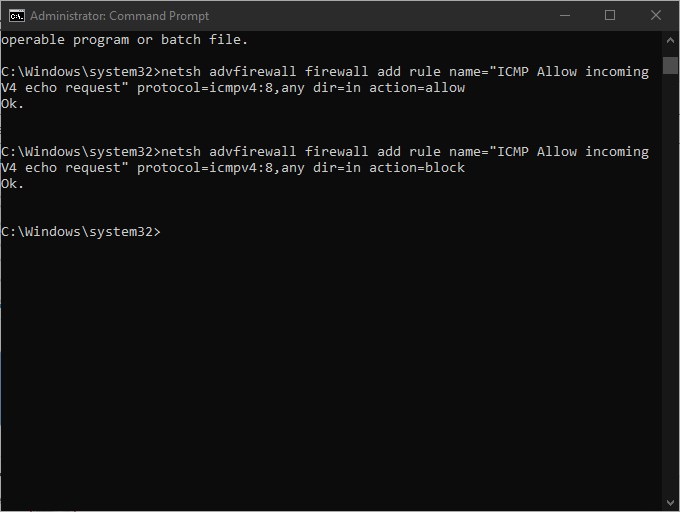
  • After that simply run the below netsh command to enable ping requests on Windows.
netsh advfirewall firewall add rule name="ICMP Allow incoming V4 echo request" protocol=icmpv4:8,any dir=in action=allow

In the same way, if you want to disable Windows 10 Ping then use this command:

netsh advfirewall firewall add rule name="ICMP Allow incoming V4 echo request" protocol=icmpv4:8,any dir=in action=block

Command to enable or disable windows 10 ping


Sunday, November 21, 2021

How to fix Error message with ‘yum update, yum install’ “This system is not registered with an entitlement server. You can use subscription-manager to register.” ?

 1-do 

/etc/yum/pluginconf.d/subscription-manager.conf


2-Inside the “subscription-manager.conf” file

 change enabled to 0 and save the file

 enabled=0


3. Lastly issue the “yum clean all” command

yum clean all

Wednesday, November 17, 2021

How to Compress Photo Size without Losing Quality For free?

Capturing a photo using a digital camera, or even using the stock images, their sizes are quite big. Even though based on your need you need to set up the aspect ratio of the image and then upload it to your website or other platforms. It depends based on your work on what you are doing with the image. But most of the time capturing an image is taking quite a lot of storage, and if you are in the same shoe then you are in the right place because in this article you are going to learn how to compress photo size without losing quality for free.

There are several methods that you can use to compress photo size without losing quality, and we are going to take a look at them. So without wasting time let’s jump into the very first method.

1. Compress Photo Size using Photoshop

You know that Adobe Photoshop is a powerful editing photo software. It is really impressive and each year Adobe is improving it more and more. But there is a feature called script which is available from the older days of Adobe Photoshop. And this feature can help you to compress photo size without losing the quality of the image. Just for this article, I’m going to use Adobe Photoshop CS6 so that this version has also the same feature.

  1. Go to the File menu and click on the script then choose image processor.
  2. Choose the folder that contains the images you want to compress.
  3. Don’t do anything with default settings and click Run.

Compress image using Image Processor

Wednesday, November 10, 2021

How to Enable Drag & Drop to the Taskbar in Windows 11

How to Enable Drag & Drop to the Taskbar in Windows 11

In this article we will talk about the drag and drop to the taskbar feature from Windows 11 that is no longer present. In the following lines, I will show you how to enable this feature using a script.

Download Windows 11 Drag & Drop to the Taskbar (Github)

The script was created by a guy from Github and Reddit and all the credit goes to him. You have his link above the article.

One thing to note about the following script is that it doesn’t enable the drag and pin to the taskbar feature, it only enables the possibility of maximizing a window by dragging and dropping an icon or an item to its taskbar icon. You will also be able to View the Desktop by dragging and dropping to the View the Desktop button from the bottom right hand corner of the Windows 11 screen.

After you download the script, all you need to do is to run it. After you run it, you should see the following command prompt that will automatically hide.

The script will automatically be set to run at startup, so you don’t have to worry about it not automatically opening at the windows startup.

How it works

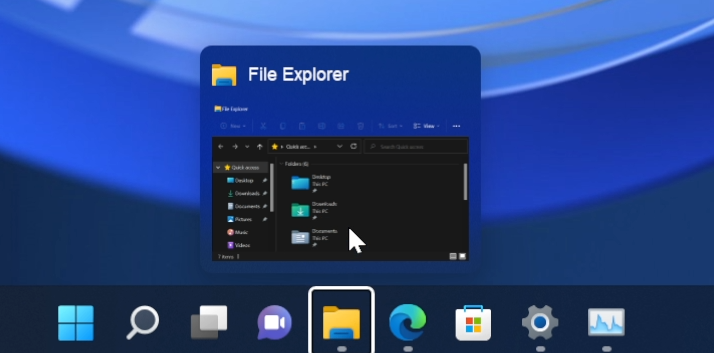
Just drag and drop an icon or an item to a certain opened window in the taskbar and after a few seconds it will be maximized.

You can also use this to Show the Desktop, by dragging and dropping an icon or an item to the Show the Desktop button from the bottom right side of the screen.

How to disable

Click on the Search Box and type there CMD. Right click on it and then click on Run as administrator. In the CMD, copy and run the following command:

taskkill /f /im Windows11DragAndDropToTaskbarFix.exe

After you run this command, the script will be disabled.

This is how you can enable the drag and drop feature to the Windows 11 taskbar. For a more in depth explanation, you can watch the video below from the youtube channel.


Monday, August 9, 2021

How to Insert and Crop an Image to Fit a Shape in Microsoft PowerPoint


When you use images in your slideshows, you want them to be attractive. One way is to combine a shape with your image. You can easily insert and crop an image to fit or fill a shape in PowerPoint.

Insert an Image into a Shape in PowerPoint

After creating the shape that you want to insert an image into, you’ll actually fill the shape with the image.

Select the shape and go to the Shape Format tab that displays. Click “Shape Fill” in the Shape Styles section of the ribbon and choose “Picture.”


Pick From a File, Stock Images, Online Pictures, or From Icons, depending on the picture that you’d like to use. Select the image and click “Insert.”


The image that you picked will then fill the shape. Now, you can adjust how the image is formatted within the shape using two actions: Fill or Fit.

   Fill or Fit the Image in the Shape

When you “Fill” a shape with an image, this adjusts the picture size to match the shape’s height or width, whichever is greatest. When you “Fit” a shape with an image, this adjusts the picture size so that both the height and width match the shape.

Click the image within the shape and go to the Picture Format tab that appears. Then, click the arrow below “Crop” in the Size section of the ribbon and choose either “Fill” or “Fit.”


You’ll notice that Fill and Fit each provide quite a different appearance. Since this is an optional step after inserting the image into the shape, choose the best option for you.


Crop an Image as a Shape in PowerPoint

If you have an image that you want to crop into a shape in your slideshow, you can do this as well.

Select the image and go to the Picture Format tab. Click the arrow below “Crop” in the Size section of the ribbon and choose “Crop to Shape.” Choose the shape that you want to use in the pop-out menu.


The image will immediately update into that shape.


You can then select the image and use the tools on the Picture Format tab, or you can right-click to open the Format Picture sidebar to add some pizzazz.