Copied from : "https://ine.com/blog/2013-04-15-installing-the-cloud-services-router-1000v-in-esxi-5-1"
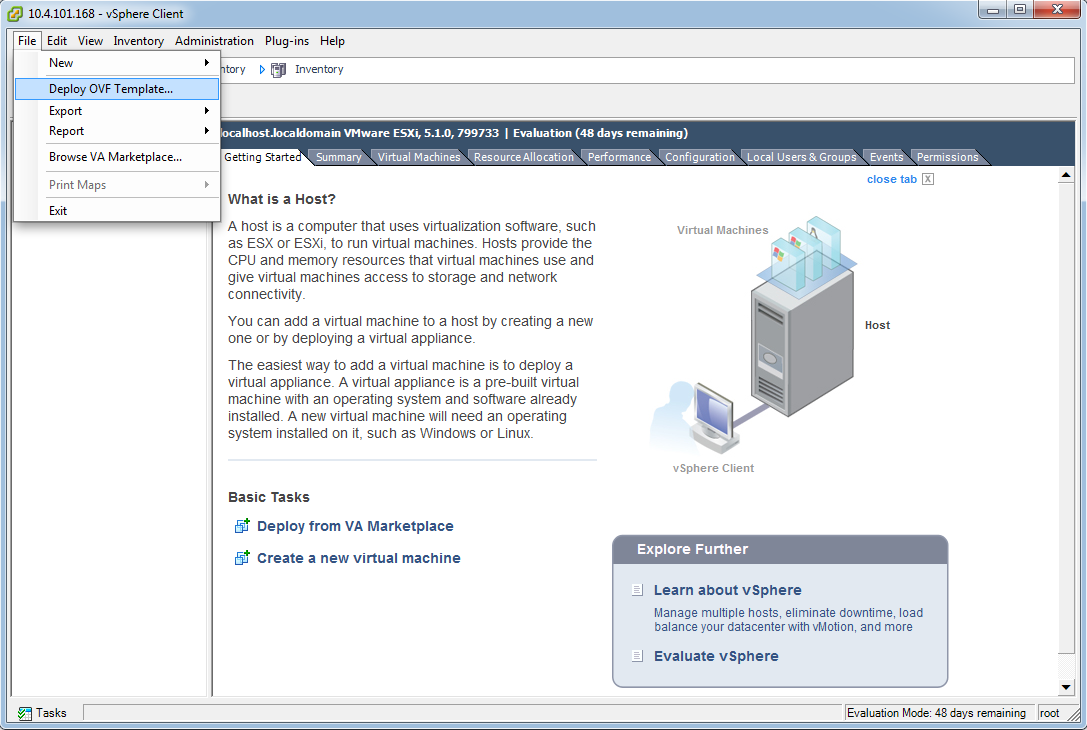
Once you have ESXi 5.1 up and running download the CSR1000v OVA (Open Virtualization Archive) file here. Note that you will need to use your Cisco CCO login to download. Once the download is complete you need to open your vSphere Client and connect to your ESXi server. Once connected select the Deploy OVF Template option from the file menu.
Select the source of the OVA file you downloaded from your local machine.
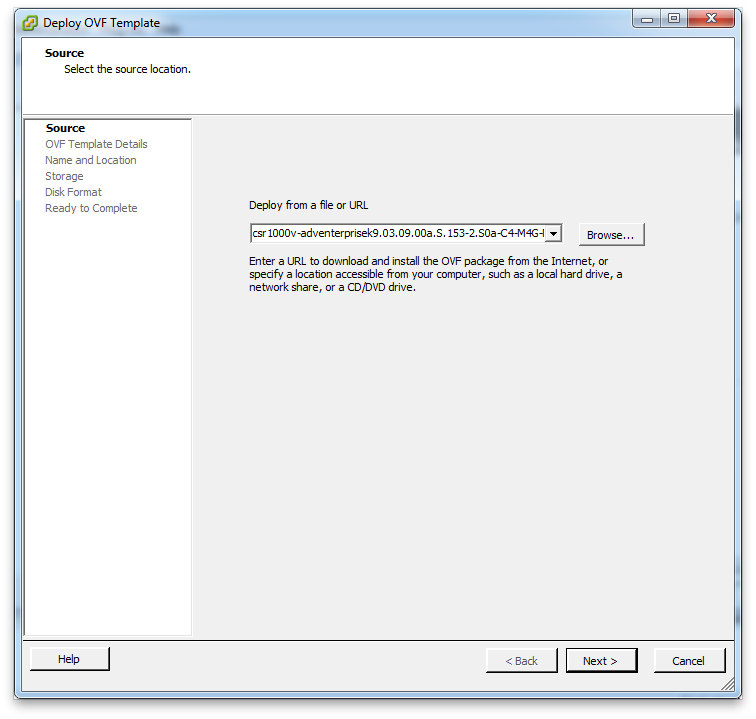
The next screen should be simular to the one below after the source has been selected.
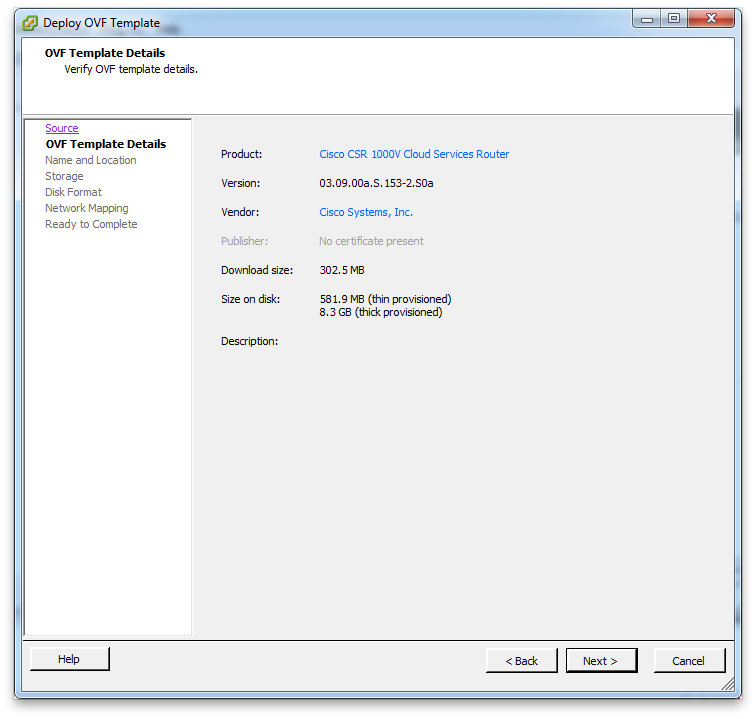
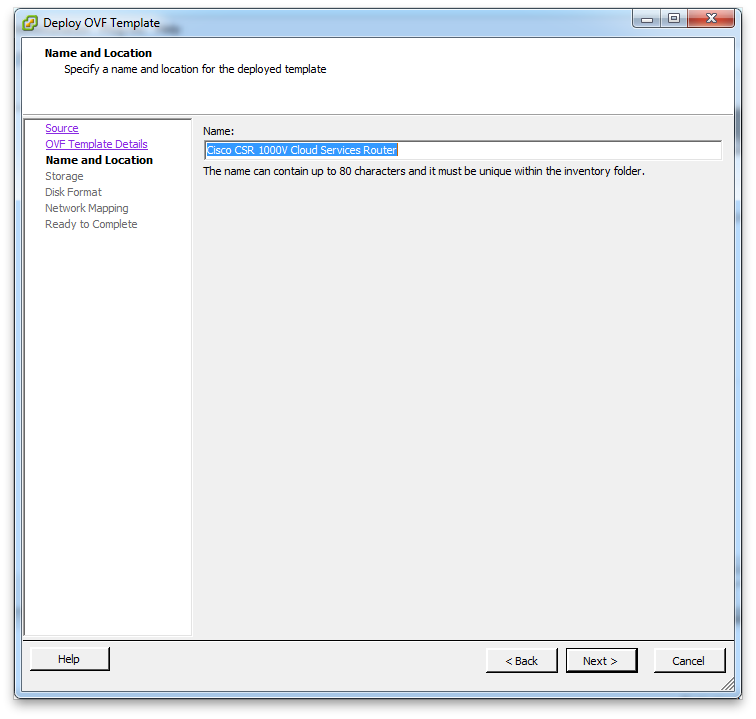
The next screen will display the name for the virtual machine. You can change this if you would like.
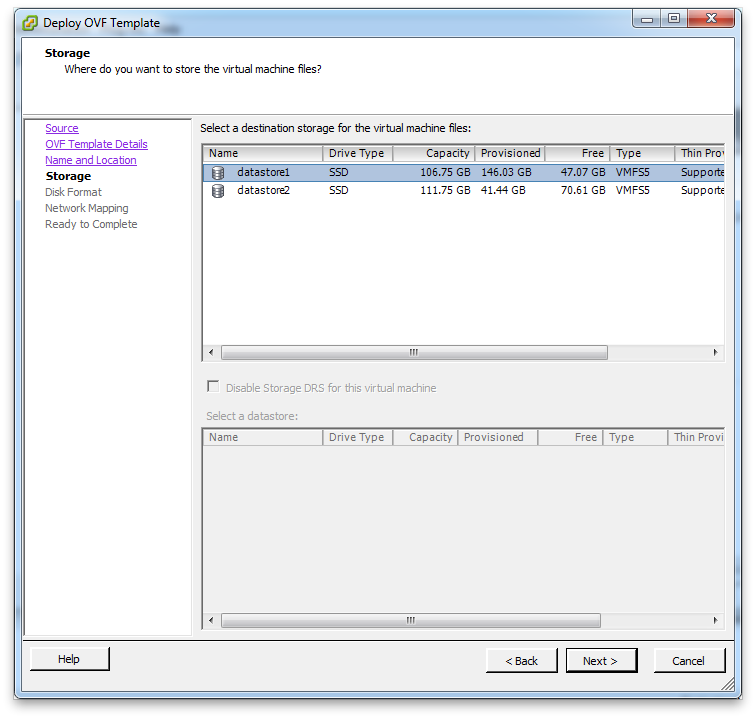
Now you need to select the datastore:
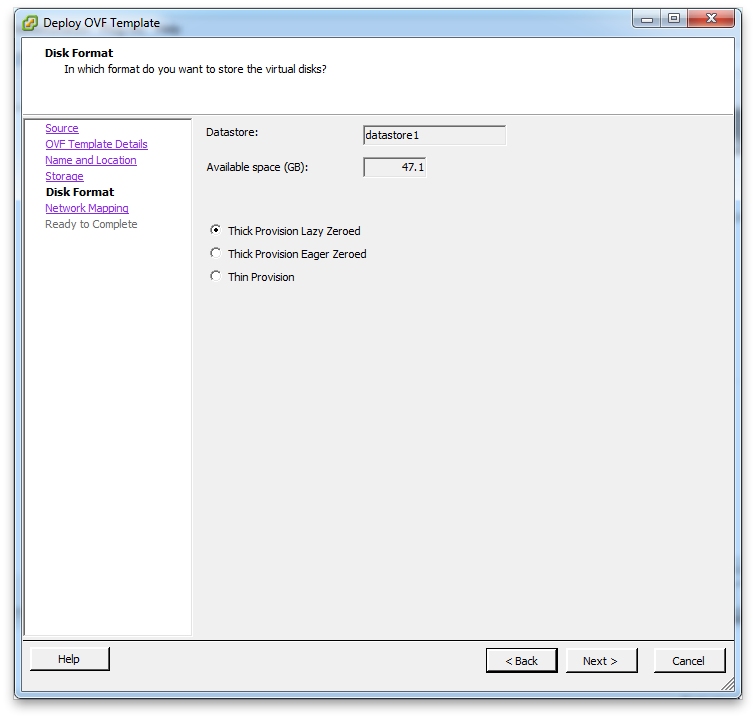
Next you will be offered the select the disk format. The default option of Thick Provision Lazy Zeroed is fine but for better performance you can select Thick Provision Eager Zeroed. To read more on the options go here.
The next screen will ask you for the mappings for the three Gigabit Ethernet interfaces that are defined in the OVF file. Just select the default here for now and we'll come back to them after our machine is installed as we need to make a couple other changes anyways that can't be done here.
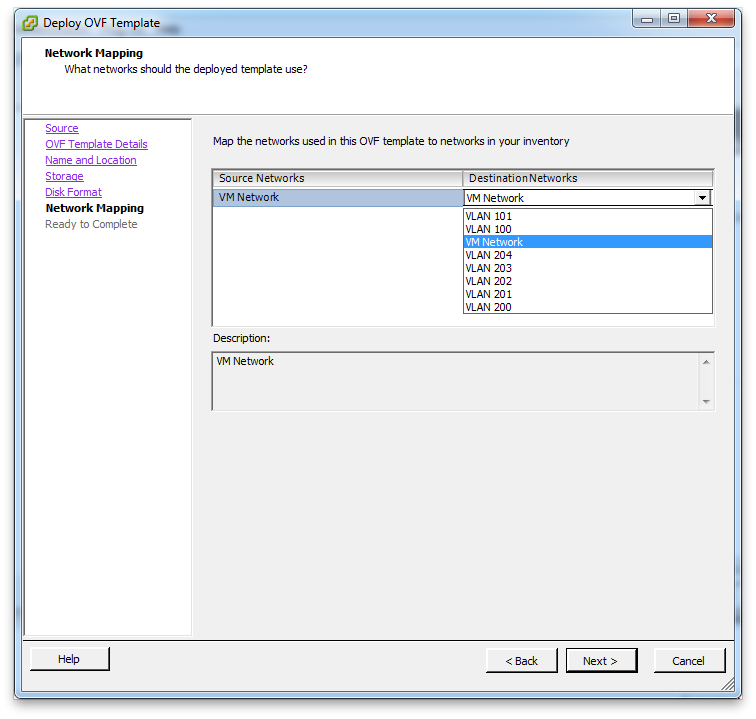
The next screen will be a summary screen so just click finish and then VMWare will start importing the OVA file.
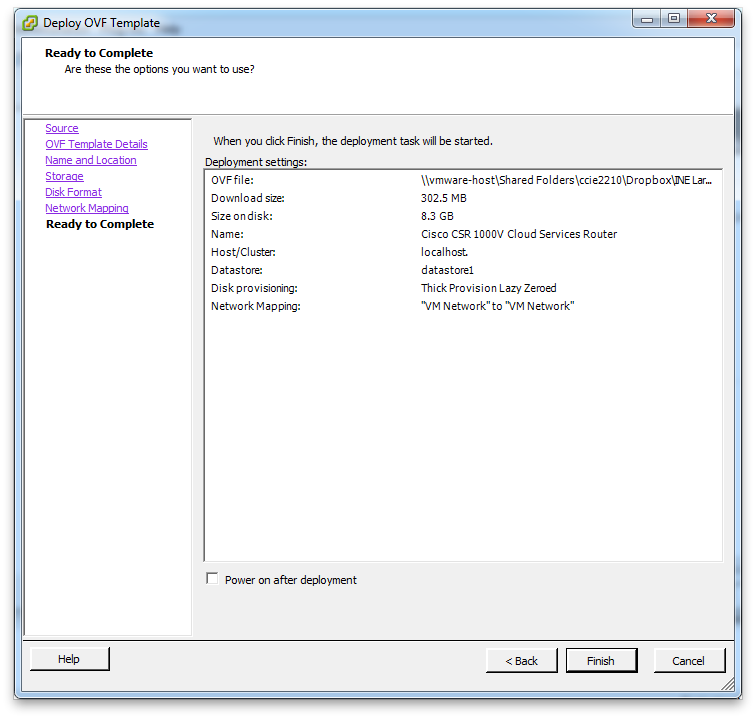
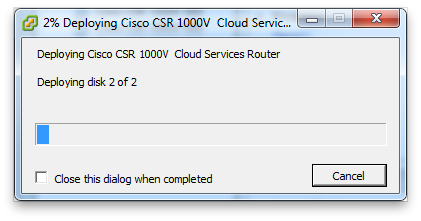
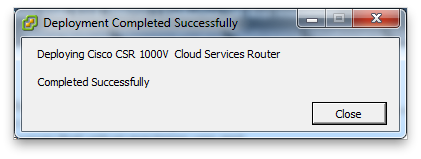
It may take a few minutes to import depending on the connection speed between your vSphere client and the ESXi server.
Once your machine uploaded you can then edit the settings.
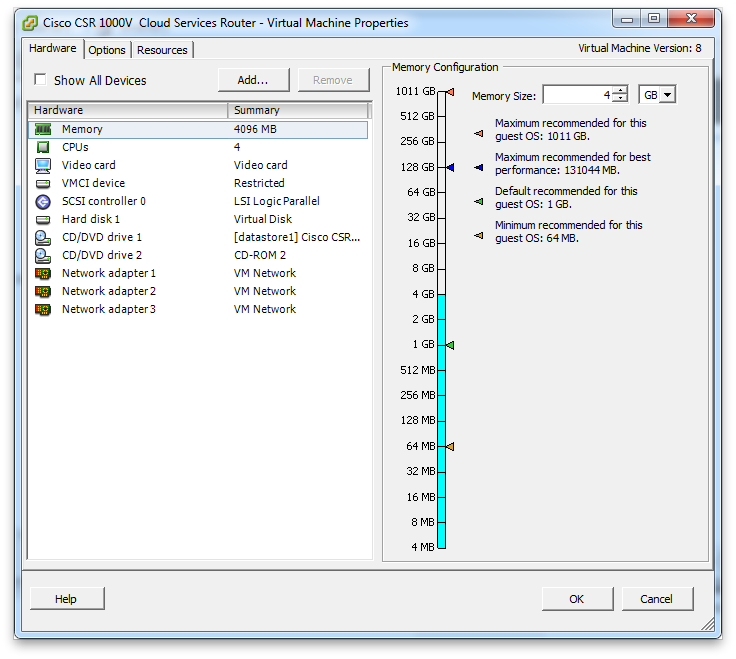
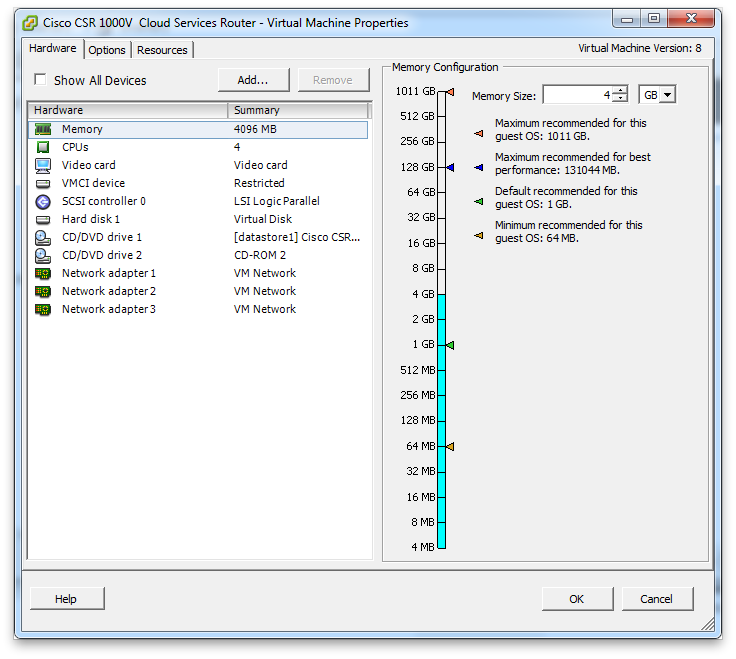
Two things we want to do here. First is that we want to alter the Network Adapter settings if needed and add a serial port so that we can use the virtual serial on the CSR1000v. This functionality (network based serial port) requires the Enterprise version of ESXi 5.1. I would recommend that you use the demo version which gives you 59 days unless you have to reinstall the demo ;-)
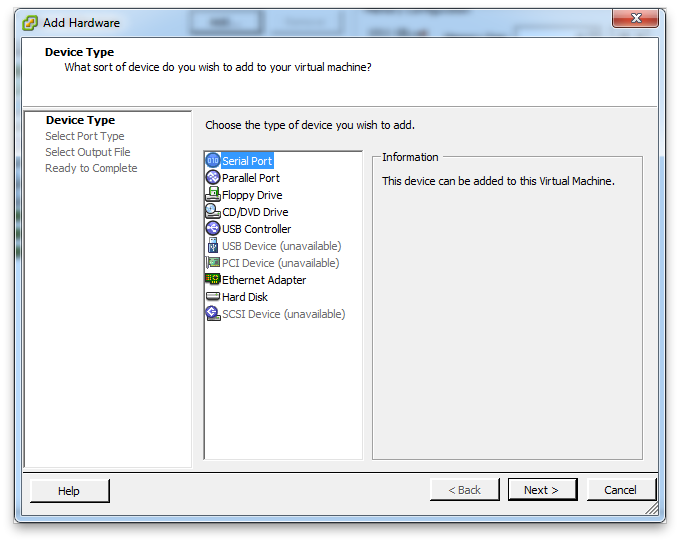
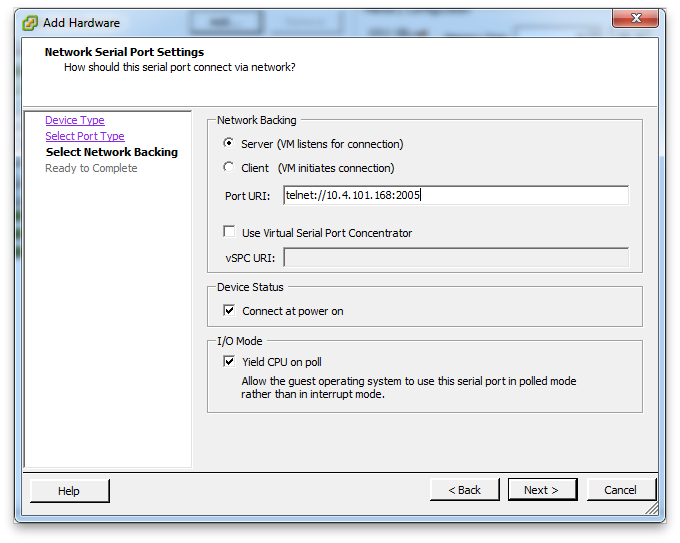
From here click "Add.." and then select Serial Port and click "Next"
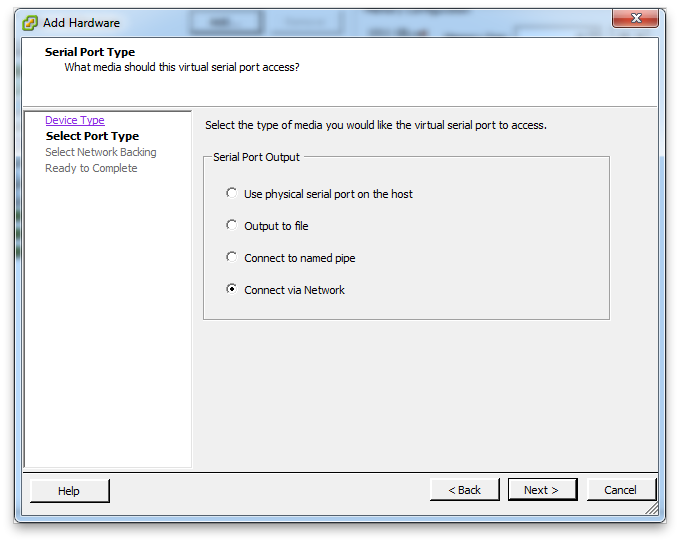
Select "Connect via Network"
Now here is where you want to select "Server" and then enter the IP address of the ESXi server along with the TCP port you want to assign to this machine. Also check "Connect at power on".
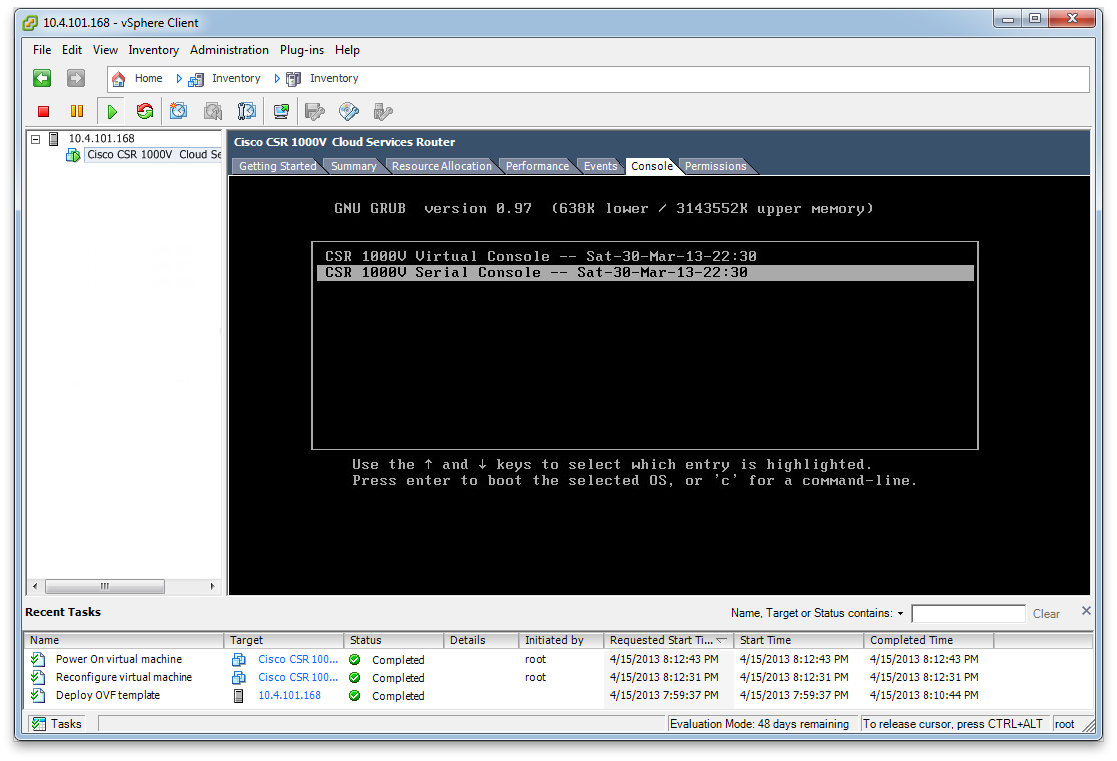
After this click finish and we're ready to start up the CSR1000v. Once booted you should see the GRUB menu. Select CSR 1000V Serial Console and hit enter.
You will need to alter the default security settings for the ESXi server to allow TCP port 2005 or whatever port you selected to allow you to telnet to the CSR1000v's serial port. To alter the security settings go to the ESXi's configuration and then select "Security Profile"
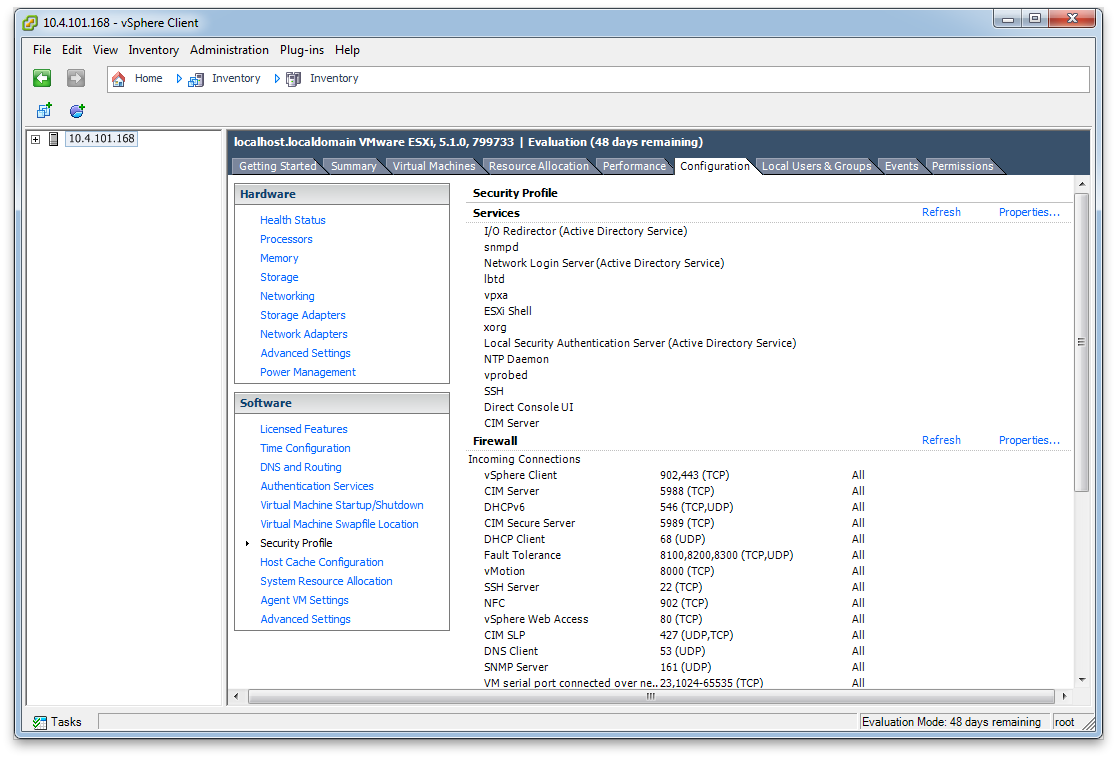
From here click on the Firewall Properties link on the right. It will open a window like below:
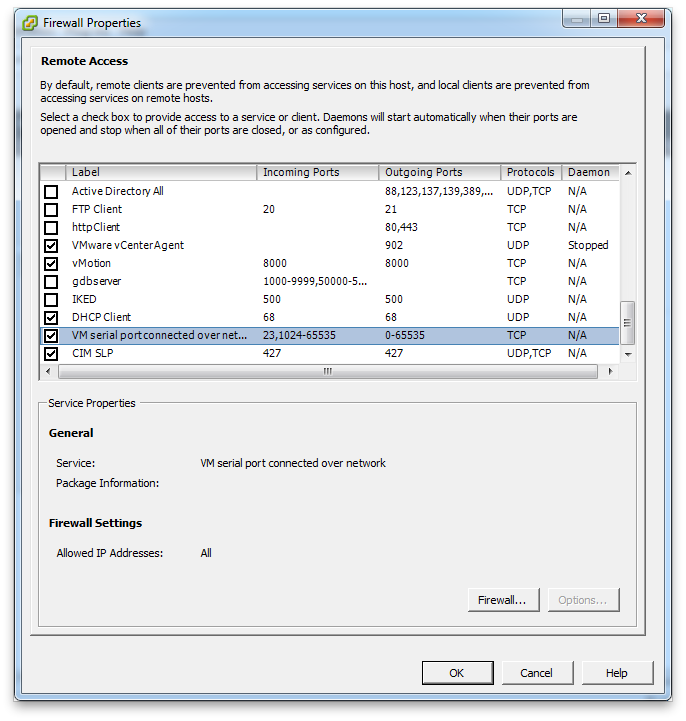
Here you will need to allow TCP port 2005 or if you are in a lab environment just select "VM serial port connected over network" which will open up all TCP high ports. Now telnet to the IP address of the ESXi machine and port number you entered for the serial port and you should see the router booting.
ccie2210$ telnet 10.4.101.168 2005
Trying 10.4.101.168...
Connected to 10.4.101.168.
Escape character is '^]'.
%IOSXEBOOT-4-BOOT_CDROM: (rp/0): Expanding super package on /bootflash
%IOSXEBOOT-4-BOOT_CDROM: (rp/0): Creating /boot/grub/menu.lst
%IOSXEBOOT-4-BOOT_CDROM: (rp/0): CD-ROM Installation finished
%IOSXEBOOT-4-BOOT_CDROM: (rp/0): Ejecting CD-ROM tray
%IOSXEBOOT-4-BOOT_CDROM: (rp/0): Rebooting from HDGNU GRUB version 0.97 (638K lower / 3143552K upper memory)
-------------------------------------------------------------------
0: CSR1000v - packages.conf
1: CSR1000v - GOLDEN IMAGE
-------------------------------------------------------------------Use the ^ and v keys to select which entry is highlighted.
Press enter to boot the selected OS, or 'c' for a command-line.Entry 0 will be booted automatically in 1 seconds.
Booting 'CSR1000v - packages.conf'root (hd0,0)
Filesystem type is ext2fs, partition type 0x83
kernel /packages.conf rw quiet root=/dev/ram console= max_loop=64 HARDWARE=virt
ual SR_BOOT=bootflash:packages.conf
Calculating SHA-1 hash...done
SHA-1 hash:
calculated 6f85a7c5:ebd0151a:b5ada94a:f7a7be4b:d7de713f
expected 6f85a7c5:ebd0151a:b5ada94a:f7a7be4b:d7de713f
package header rev 1 structure detected
Calculating SHA-1 hash...done
SHA-1 hash:
calculated d4ab3a48:ae55f382:4237a12a:7be2c99b:d8f1f594
expected d4ab3a48:ae55f382:4237a12a:7be2c99b:d8f1f594
Package type:0x7531, flags:0x0
[Linux-bzImage, setup=0x2e00, size=0x32e4620]
[isord @ 0x7e0f6000, 0x1ef9800 bytes]%IOSXEBOOT-4-WATCHDOG_DISABLED: (rp/0): Hardware watchdog timer disabled: watchdog device not found
%IOSXEBOOT-4-EUSB_PROVISIONING: (rp/0): Unsupported low capacity eUSB detected in VXE boardRestricted Rights Legend
Use, duplication, or disclosure by the Government is
subject to restrictions as set forth in subparagraph
(c) of the Commercial Computer Software - Restricted
Rights clause at FAR sec. 52.227-19 and subparagraph
(c) (1) (ii) of the Rights in Technical Data and Computer
Software clause at DFARS sec. 252.227-7013.cisco Systems, Inc.
170 West Tasman Drive
San Jose, California 95134-1706Cisco IOS Software, IOS-XE Software (X86_64_LINUX_IOSD-ADVENTERPRISEK9-M), Version 15.3(2)S0a, RELEASE SOFTWARE (fc1)
Technical Support: http://www.cisco.com/techsupport
Copyright (c) 1986-2013 by Cisco Systems, Inc.
Compiled Sat 30-Mar-13 19:08 by mcpreCisco IOS-XE software, Copyright (c) 2005-2013 by cisco Systems, Inc.
All rights reserved. Certain components of Cisco IOS-XE software are
licensed under the GNU General Public License ("GPL") Version 2.0. The
software code licensed under GPL Version 2.0 is free software that comes
with ABSOLUTELY NO WARRANTY. You can redistribute and/or modify such
GPL code under the terms of GPL Version 2.0. For more details, see the
documentation or "License Notice" file accompanying the IOS-XE software,
or the applicable URL provided on the flyer accompanying the IOS-XE
software.% failed to initialize nvram
This product contains cryptographic features and is subject to United
States and local country laws governing import, export, transfer and
use. Delivery of Cisco cryptographic products does not imply
third-party authority to import, export, distribute or use encryption.
Importers, exporters, distributors and users are responsible for
compliance with U.S. and local country laws. By using this product you
agree to comply with applicable laws and regulations. If you are unable
to comply with U.S. and local laws, return this product immediately.A summary of U.S. laws governing Cisco cryptographic products may be found at:
http://www.cisco.com/wwl/export/crypto/tool/stqrg.htmlIf you require further assistance please contact us by sending email to
export@cisco.com.cisco CSR1000V (VXE) processor with 1141424K/6147K bytes of memory.
Processor board ID 940WXLZ2LL4
2 Gigabit Ethernet interfaces
32768K bytes of non-volatile configuration memory.
4194304K bytes of physical memory.
7774207K bytes of virtual hard disk at bootflash:.SETUP: new interface GigabitEthernet2 placed in "shutdown" state
SETUP: new interface GigabitEthernet0 placed in "shutdown" statePress RETURN to get started!
*Apr 16 03:17:58.679: %IOSXE_RP_NV-3-NV_ACCESS_FAIL: Initial read of NVRAM contents failed
*Apr 16 03:17:59.305: %VXE_THROUGHPUT-6-LEVEL: Throughput level has been set to 2500 kbps
*Apr 16 03:18:02.785: %IFMGR-7-NO_IFINDEX_FILE: Unable to open nvram:/ifIndex-table No such file or directory
*Apr 16 03:18:04.449: DSENSOR: protocol cdp is registered with sensor
*Apr 16 03:18:04.470: %SPANTREE-5-EXTENDED_SYSID: Extended SysId enabled for type vlan
*Apr 16 03:18:04.911: %LINK-3-UPDOWN: Interface Lsmpi0, changed state to up
*Apr 16 03:18:04.912: %LINK-3-UPDOWN: Interface EOBC0, changed state to up
*Apr 16 03:18:04.912: %LINEPROTO-5-UPDOWN: Line protocol on Interface VoIP-Null0, changed state to up
*Apr 16 03:18:04.912: %LINEPROTO-5-UPDOWN: Line protocol on Interface LI-Null0, changed state to up
*Apr 16 03:18:05.356: %IOSXE_MGMTVRF-6-CREATE_SUCCESS_INFO: Management vrf Mgmt-intf created with ID 1, ipv4 table-id 0x1, ipv6 table-id 0x1E000001
*Apr 16 03:18:05.406: %LINK-3-UPDOWN: Interface GigabitEthernet0, changed state to down
*Apr 16 03:18:05.410: %LINK-3-UPDOWN: Interface LIIN0, changed state to up
*Apr 16 03:18:05.455: %DYNCMD-7-CMDSET_LOADED: The Dynamic Command set has been loaded from the Shell Manager
*Apr 16 03:18:05.871: %LINK-3-UPDOWN: Interface GigabitEthernet1, changed state to down
*Apr 16 03:18:05.880: %LINK-3-UPDOWN: Interface GigabitEthernet2, changed state to down
*Apr 16 03:17:58.400: %IOSXE-5-PLATFORM: R0/0: xinetd[19698]: xinetd Version 2.3.14 started with no options compiled in.
*Apr 16 03:17:58.400: %IOSXE-5-PLATFORM: R0/0: xinetd[19698]: Started working: 1 available service
*Apr 16 03:17:58.434: %IOSXE-5-PLATFORM: R0/0: xinetd[19709]: xinetd Version 2.3.14 started with no options compiled in.
*Apr 16 03:17:58.434: %IOSXE-5-PLATFORM: R0/0: xinetd[19709]: Started working: 3 available services
*Apr 16 03:17:59.634: %CMRP-5-PRERELEASE_HARDWARE: R0/0: cmand: F0 is pre-release hardware
*Apr 16 03:18:00.823: %CMLIB-6-THROUGHPUT_VALUE: R0/0: cmand: Throughput license found, throughput set to 2500 kbps
*Apr 16 03:18:03.063: %CPPHA-7-START: F0: cpp_ha: CPP 0 preparing image /tmp/sw/fp/0/0/fp/mount/usr/cpp/bin/qfp-ucode-csr
*Apr 16 03:18:03.179: %CPPHA-7-START: F0: cpp_ha: CPP 0 startup init image /tmp/sw/fp/0/0/fp/mount/usr/cpp/bin/qfp-ucode-csr
*Apr 16 03:18:06.407: %LINEPROTO-5-UPDOWN: Line protocol on Interface GigabitEthernet0, changed state to down
*Apr 16 03:18:06.409: %LINEPROTO-5-UPDOWN: Line protocol on Interface LIIN0, changed state to up
*Apr 16 03:18:06.872: %LINEPROTO-5-UPDOWN: Line protocol on Interface GigabitEthernet1, changed state to down
*Apr 16 03:18:06.881: %LINEPROTO-5-UPDOWN: Line protocol on Interface GigabitEthernet2, changed state to down
*Apr 16 03:18:07.325: %DYNCMD-7-PKGINT_INSTALLED: The command package 'platform_trace' has been succesfully installed
*Apr 16 03:18:25.342: AUTOINSTALL: GigabitEthernet1 is assigned 10.4.101.228
*Apr 16 03:18:41.567: %LINK-5-CHANGED: Interface GigabitEthernet0, changed state to administratively down
*Apr 16 03:18:41.782: %LINK-5-CHANGED: Interface GigabitEthernet2, changed state to administratively down
*Apr 16 03:18:43.361: %IOSXE_OIR-6-INSCARD: Card (rp) inserted in slot R1
*Apr 16 03:18:43.361: %IOSXE_OIR-6-INSCARD: Card (fp) inserted in slot F0
*Apr 16 03:18:43.361: %IOSXE_OIR-6-ONLINECARD: Card (fp) online in slot F0
*Apr 16 03:18:43.423: %SYS-5-RESTART: System restarted --
Cisco IOS Software, IOS-XE Software (X86_64_LINUX_IOSD-ADVENTERPRISEK9-M), Version 15.3(2)S0a, RELEASE SOFTWARE (fc1)
Technical Support: http://www.cisco.com/techsupport
Copyright (c) 1986-2013 by Cisco Systems, Inc.
Compiled Sat 30-Mar-13 19:08 by mcpre
*Apr 16 03:18:43.501: %CRYPTO-6-ISAKMP_ON_OFF: ISAKMP is OFF
*Apr 16 03:18:43.501: %CRYPTO-6-GDOI_ON_OFF: GDOI is OFF
*Apr 16 03:18:43.540: %LINK-3-UPDOWN: Interface GigabitEthernet1, changed state to up
*Apr 16 03:18:44.541: %LINEPROTO-5-UPDOWN: Line protocol on Interface GigabitEthernet1, changed state to up
%Error opening tftp://255.255.255.255/network-confg (Timed out)
%Error opening tftp://255.255.255.255/cisconet.cfg (Timed out)
%Error opening tftp://255.255.255.255/router-confg (Timed out)
%Error opening tftp://255.255.255.255/ciscortr.cfg (Timed out)
%Error opening tftp://255.255.255.255/network-confg (Timed out)
%Error opening tftp://255.255.255.255/cisconet.cfg (Timed out)
%Error opening tftp://255.255.255.255/router-confg (Timed out)
%Error opening tftp://255.255.255.255/ciscortr.cfg (Timed out)
Router>
At this point I haven't activated the license so the router is limited to 2.5Mbps throughput. To activate the demo license use the platform hardware throughput level command in global configuration mode.
Router>en
Router#conf t
Enter configuration commands, one per line. End with CNTL/Z.
Router(config)#platform hardware throughput level ?
10000 throughput in kbps
25000 throughput in kbps
50000 throughput in kbpsRouter(config)#platform hardware throughput level 50000
Feature Name:prem_evalPLEASE READ THE FOLLOWING TERMS CAREFULLY. INSTALLING THE LICENSE OR
LICENSE KEY PROVIDED FOR ANY CISCO PRODUCT FEATURE OR USING SUCH
PRODUCT FEATURE CONSTITUTES YOUR FULL ACCEPTANCE OF THE FOLLOWING
TERMS. YOU MUST NOT PROCEED FURTHER IF YOU ARE NOT WILLING TO BE BOUND
BY ALL THE TERMS SET FORTH HEREIN.Use of this product feature requires an additional license from Cisco,
together with an additional payment. You may use this product feature
on an evaluation basis, without payment to Cisco, for 60 days. Your use
of the product, including during the 60 day evaluation period, is
subject to the Cisco end user license agreement
http://www.cisco.com/en/US/docs/general/warranty/English/EU1KEN_.html
If you use the product feature beyond the 60 day evaluation period, you
must submit the appropriate payment to Cisco for the license. After the
60 day evaluation period, your use of the product feature will be
governed solely by the Cisco end user license agreement (link above),
together with any supplements relating to such product feature. The
above applies even if the evaluation license is not automatically
terminated and you do not receive any notice of the expiration of the
evaluation period. It is your responsibility to determine when the
evaluation period is complete and you are required to make payment to
Cisco for your use of the product feature beyond the evaluation period.Your acceptance of this agreement for the software features on one
product shall be deemed your acceptance with respect to all such
software on all Cisco products you purchase which includes the same
software. (The foregoing notwithstanding, you must purchase a license
for each software feature you use past the 60 days evaluation period,
so that if you enable a software feature on 1000 devices, you must
purchase 1000 licenses for use past the 60 day evaluation period.)Activation of the software command line interface will be evidence of
your acceptance of this agreement.ACCEPT? (yes/[no]): yes
*Apr 16 04:30:21.271: %LICENSE-6-EULA_ACCEPTED: EULA for feature prem_eval 1.0 has been accepted. UDI=CSR1000V:940WXLZ2LL4; StoreIndex=0:Built-In License Storage
Router(config)#
*Apr 16 04:30:23.939: %VXE_THROUGHPUT-6-LEVEL: Throughput level has been set to 50000 kbps
Router(config)#
This technically isn't needed if you are going to use it in a lab environment. At this point your router is ready to go.
Router(config)#do sho run
Building configuration...Current configuration : 1047 bytes
!
version 15.3
service timestamps debug datetime msec
service timestamps log datetime msec
no platform punt-keepalive disable-kernel-core
platform console serial
platform hardware throughput level 50000
!
hostname Router
!
boot-start-marker
boot-end-marker
!
!
vrf definition Mgmt-intf
!
address-family ipv4
exit-address-family
!
address-family ipv6
exit-address-family
!
!
no aaa new-model
!
!
!
!
!
!
!
!
!
!
!
!
!
!
!
!
multilink bundle-name authenticated
!
!
!
!
!
!
!
spanning-tree extend system-id
!
!
redundancy
mode none
!
!
!
!
!
!
ip tftp source-interface GigabitEthernet0
!
!
!
!
!
!
!
!
!
!
!
!
!
interface GigabitEthernet1
no ip address
shutdown
negotiation auto
!
interface GigabitEthernet2
no ip address
shutdown
negotiation auto
!
interface GigabitEthernet0
vrf forwarding Mgmt-intf
no ip address
shutdown
negotiation auto
!
ip forward-protocol nd
!
no ip http server
no ip http secure-server
!
!
!
!
control-plane
!
!
!
!
!
!
!
!
line con 0
stopbits 1
line aux 0
stopbits 1
line vty 0 4
login
!
!
endRouter(config)#
Now that my router is ready to go I'll clone it because a single router isn't much to learn on. Ideally if you are going to reuse this machine in the future you wait to activate the license after the device is cloned. To clone the machine go to the server configuration tab and then select the datastore where you installed the CSR1000v onto and then right click on it. From there select "Browse Datastore..."
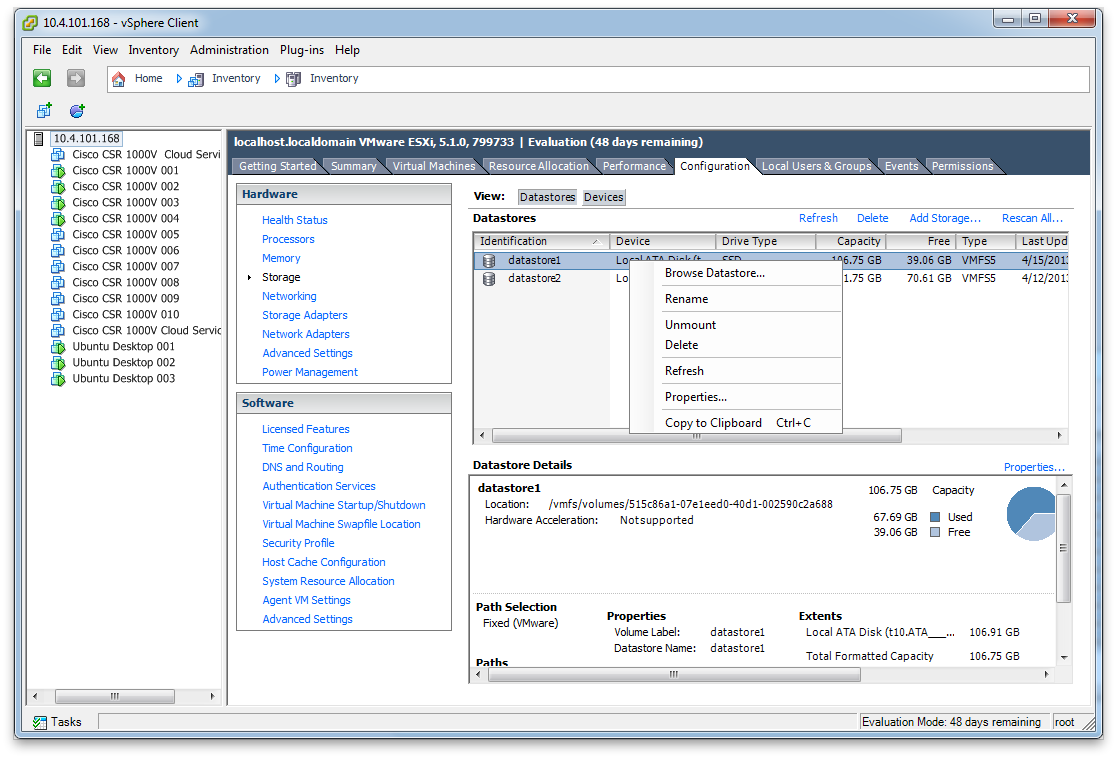
From here go under the directory for the CSR1000v and copy the contents of the directory. From there click on the root of the datastore and then select the folder icon to add a new directory.
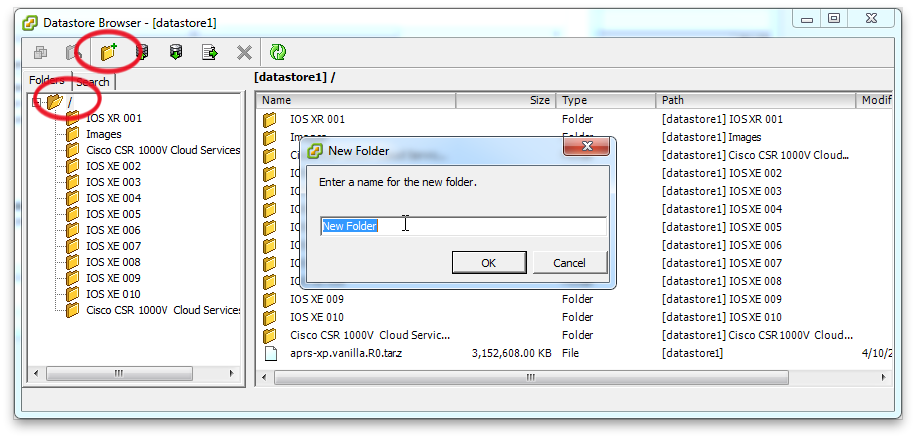
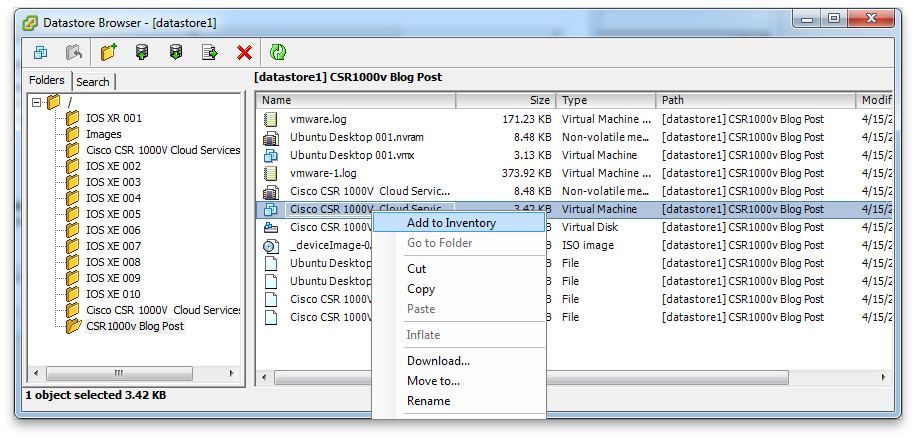
Enter the directory name and then paste the contents into the new directory. After it has been pasted in, right click on the "Cisco CSR1000v Cloud Services Router.vmx" file and select "Add to Inventory". Change the default name if you would like and select the "Resource Pool" and finally finish.
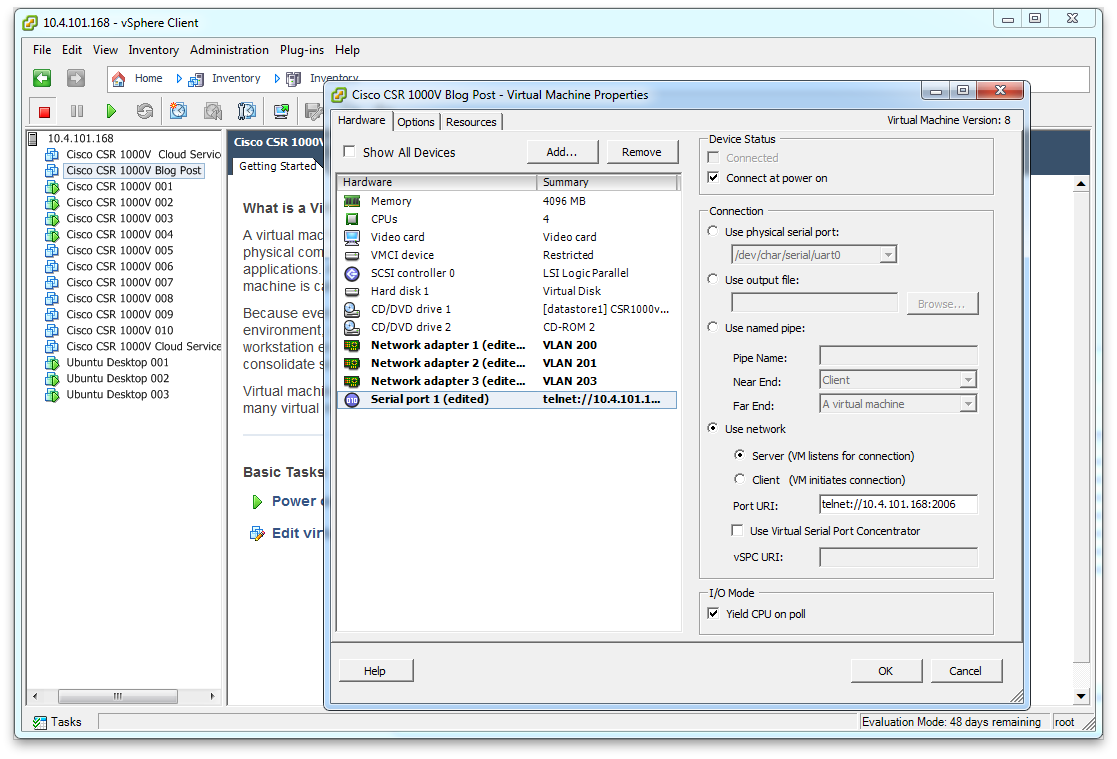
You should now see the second CSR1000v in your ESXi server's inventory. From there we'll edit the settings to change the TCP port number for the virtual serial port and apply any VLANs from the ESXi to the CSR1000v's Gigabit Ethernet interfaces.
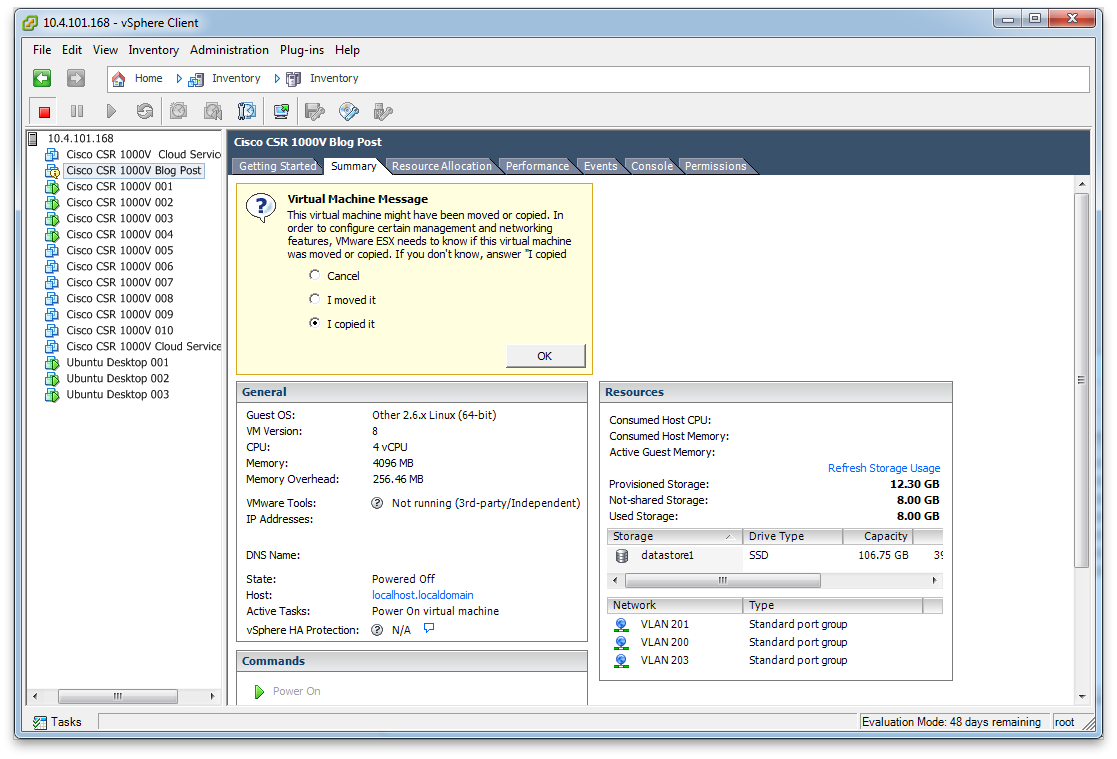
You are now ready to start up the second router. Note that after you start it VMware will ask you if you copied the virtual machine or moved it. Select "I copied it" and then click ok. Your router will now boot up.
ccie2210$ telnet 10.4.101.168 2006
Trying 10.4.101.168...
Connected to 10.4.101.168.
Escape character is '^]'.
Entry 0 will be booted automatically in 1 seconds.
Booting 'CSR1000v - packages.conf'root (hd0,0)
Filesystem type is ext2fs, partition type 0x83
kernel /packages.conf rw quiet root=/dev/ram console= max_loop=64 HARDWARE=virt
ual SR_BOOT=bootflash:packages.conf
Calculating SHA-1 hash...done
SHA-1 hash:
calculated 6f85a7c5:ebd0151a:b5ada94a:f7a7be4b:d7de713f
expected 6f85a7c5:ebd0151a:b5ada94a:f7a7be4b:d7de713f
package header rev 1 structure detected
Calculating SHA-1 hash...done
The router will now be booting up and ready to go.
Use the same procedure outlined above to create as many routers as you like. You will of course want to create VLANs within the ESXi server to allow communication between the routers. For an overview of how to manage the ESXi's networking configuration go here.
Tomorrow I'll post another installation guide on how to install the CSR1000v in VMware Workstation and use it as a production router providing internet access.
Lastly if anyone would like to try out a few of these send me an email and I'll get you access.